

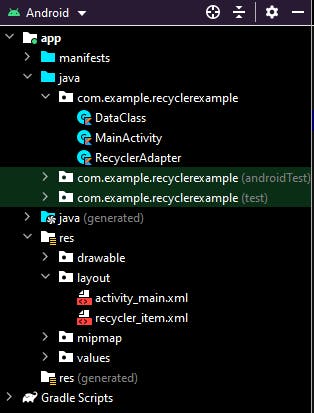
KOTLIN-Create a Recycler View with Click and Long Click Listener(the right way)


In this project I will be explaining how to make a recycler view adapter, with click and long click listener. But before we start, create a project and name it RecyclerExample or anything you want. We will be using kotlin as our language of choice, you can also use java if you are familiar with the concept. When you are finished creating your project, you should have a MainActivity.kt file and an activity_main.xml as a layout file.
⚪Step1
The next thing to do is create a data class and name it “DataClass”, I know the name is self explanatory. In the parameters of the data class we created, add a “title” of String type and "detail" of String type, Your data class should look something like this.
data class DataClass(val title: String, val detail: String)
⚪Step2
Next create a layout file and call it “recycler_item”, this will be the layout that will display each of data that will display in the recycler view. Your recycler_item.xml file should look something like this.
<?xml version="1.0" encoding="utf-8"?>
<LinearLayout
    xmlns:android="http://schemas.android.com/apk/res/android"
    android:layout_width="match_parent"
    android:layout_height="wrap_content"
    android:id="@+id/id_linear_layout"
    android:layout_marginVertical="3dp"
    android:orientation="vertical">
    <TextView
        android:layout_width="match_parent"
        android:layout_height="wrap_content"
        android:text="@string/app_name"
        android:id="@+id/id_tv_title"
        android:paddingHorizontal="10dp"
        android:textStyle="bold"
        android:textColor="@color/black"
        android:textSize="30sp"
        android:gravity="center_horizontal"/>
    <TextView
        android:layout_width="match_parent"
        android:layout_height="wrap_content"
        android:text="@string/app_name"
        android:id="@+id/id_tv_detail"
        android:paddingHorizontal="10dp"
        android:textStyle="italic"
        android:textSize="25sp"
        android:gravity="center_horizontal"/>
</LinearLayout>
⚪Step3
Before we start creating the recycler adapter, add a recycler view to the “activity_main.xml” You will notice that we set the listitem to the recycler_item layout we created earlier, and it should look something like this.
<?xml version="1.0" encoding="utf-8"?>
<LinearLayout
    xmlns:android="http://schemas.android.com/apk/res/android"
    xmlns:app="http://schemas.android.com/apk/res-auto"
    xmlns:tools="http://schemas.android.com/tools"
    android:layout_width="match_parent"
    android:layout_height="match_parent"
    android:orientation="vertical"
    tools:context=".MainActivity">

    <androidx.recyclerview.widget.RecyclerView
        android:layout_width="match_parent"
        android:layout_height="wrap_content"
        android:id="@+id/id_rv_recycler"
        tools:listitem="@layout/recycler_item"/>

</LinearLayout>
⚪Step4
In your MainActivity we will initialize the recycler view we created in activity_main.xml layout. To do so create a global variable named id_rv_recycler like this
// make it a global variable
private lateinit var id_rv_recycler: RecyclerView
// and then we initialize it inside the onCreate(if you are in an activity) or //onCreateView Method(if you are in a fragment)
id_rv_recycler = findViewById(R.id.id_rv_recycler)
⚪Step5
CREATING THE ADAPTER
I am going to break this step5 into section because it is quiet long and maybe it will help you understand it better.
Section1
Now lets create a recycler adapter, this is where the magic will happen. To do so create a new class (create a new class in a new file) and name it “RecyclerAdapter” (the file name should also be named RecyclerAdapter). Add this piece of code to the RecyclerAdapter class you created and it should look like this
class RecyclerAdapter: RecyclerView.Adapter<RecyclerAdapter.ViewHolder> {
    private var array_list: ArrayList<DataClass> = ArrayList()
    private var context: Context
    private var layout: Int = 0
    private var recycler_view: RecyclerView
    private lateinit var click_listener:OnItemClickListener

    constructor(context:Context,
                recyclerview: RecyclerView,
                layout:Int,
                layout_manager: RecyclerView.LayoutManager
    ){
        this.recycler_view = recyclerview
        this.context = context
        this.layout = layout
        this.recycler_view.layoutManager = layout_manager
        this.recycler_view.adapter = this
    }


    interface OnItemClickListener{
        // inter face for auto loading itemClick and longItemClick
        fun onItemClick(position: Int, view:View)
        fun onLongItemClick(position: Int, view:View)
    }

   override fun onCreateViewHolder(parent: ViewGroup, viewType: Int): ViewHolder {
        val view = LayoutInflater.from(context).inflate(layout, parent, false)
        return ViewHolder(view, click_listener)
    }

    override fun onBindViewHolder(holder: ViewHolder, position: Int) {
        // bind your view holder class with your recycler adapter
        // you are binding your cell view with your recyclerview
        val arraylist = array_list[position]
        holder.title.text = arraylist.title
        holder.detail.text = arraylist.detail
    }

    override fun getItemCount(): Int {
        //get the number of item in your recyclerview
        return array_list.size
    }

    fun emptyAdapter(){
        //remove all item from your recyclerview
        array_list.clear()
    }

    fun addToAdapter(element: DataClass){
        // add item to your recyclerview
        array_list.add(element)
    }

    fun addToAdapter(index:Int, element:DataClass){
        // add item to an index spot of your recyclerview
        array_list.add(index, element)
    }


    class ViewHolder(item_view: View, listener:OnItemClickListener): RecyclerView.ViewHolder(item_view) {
        // initialize the item your view holder will hold
        val title: TextView = item_view.findViewById(R.id.id_tv_title)
        val detail: TextView = item_view.findViewById(R.id.id_tv_detail)
        init {
            item_view.setOnLongClickListener{
                listener.onLongItemClick(adapterPosition, item_view)
                true
            }
            item_view.setOnClickListener {
                listener.onItemClick(adapterPosition, item_view)
            }
        }
    }
}
Section2
You will notice the “RecyclerAdapter” extends “RecyclerView.Adapter” and has a type of “RecyclerAdapter.ViewHolder”. The RecyclerAdapter.ViewHolder is the inner class we created inside RecyclerAdapter, which we called ViewHolder. This two class work side by side in making the recycling magic happen.
Section3
We also created private global variables that can be access from anywhere inside the RecyclerAdapter class. Notice the array_list variable is an ArrayList type that accept the class DataClass we created earlier as it’s type.
Section4
We created an interface named “OnItemClickListener ”that will be use to load the click and long click listener (the interface can be named anything), we also gave the interface two default method named onItemClick and onLongItemClick, they both accept a position of type Int and a view of type View.
Section5
We also created a constructor that accepts the application context, recycler view, layout (which is the resource directory of the recycler_item.xml file), and the layout manager (which will help us manage the way our recycler items will be display). Then we initialize the global variables we created earlier inside the constructor.
Section6
We also override the default method that came with the extended "RecyclerView.Adapter". which are onCreateViewHolder, onBindViewHolder and getItemCount .
The emptyAdapter, addToAdapter, are method we created on our own to help us manage the array_list.
Section7
We also created an class named “ViewHolder” inside the RecyclerAdapter class, which has parameter item_view of type View (this is very nesecceray) and the listener of type OnItemClickListener which is the interface we created in the top class. The ViewHolder extends the “RecyclerView.ViewHolder” and takes item_view as the parameter. Inside the Viewholder, we initialize the views we created inside the “recycler_item.xml” layout file.
Section8
We set an init execution that will execute anytime the ViewHolder is been called by the RecyclerAdapter. The adapterPosition we pass inside the “listener.onLongItemClick(adapterPosition, item_view)” and the “listener.onItemClick(adapterPosition, item_view)” holds the position of each item view in the adapter, and this adapterPosition came with the extended RecyclerView.ViewHolder.
WOW! I hope you understand all that, if you don’t I will paste the link to my git repository where you will see the the full code.
Section9
Now lets continue. Create a method inside the “RecyclerAdapter class not the ViewHolder class” and name it onClickListener, your method should look something like this.
fun onClickListener(listener:OnItemClickListener){
    click_listener = listener
}
This will give you the edge of been able to call this function from your activity or fragment class
⚪Step6
HOW TO USE THIS ADAPTER
Section1
We are done with the RecyclerAdapter class, now open your MainActivity.kt file then make the RecyclerAdapter class globally callable like this
private lateinit var rv_adapter: RecyclerAdapter
and initialize the rv_adapter inside the onCreate(if you are in an activity) or onCreateView(if you are in a fragment) method like this. If you are in a fragment you can change the “applicationContext” to “requireContext()”
rv_adapter = RecyclerAdapter(applicationContext,
    id_rv_recycler,
    R.layout.recycler_item,
    LinearLayoutManager(applicationContext, RecyclerView.VERTICAL, false)
)
Section2
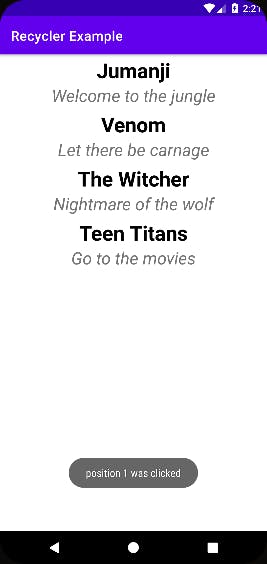
First let’s add some dummy data to the recycler adapter so it display in the recycler view
rv_adapter.addToAdapter(DataClass("Jumanji", "Welcome to the jungle"))
rv_adapter.addToAdapter(DataClass("Venom", "Let there be carnage"))
rv_adapter.addToAdapter(DataClass("The Witcher", "Nightmare of the wolf"))
rv_adapter.addToAdapter(DataClass("Teen Titans", "Go to the movies"))
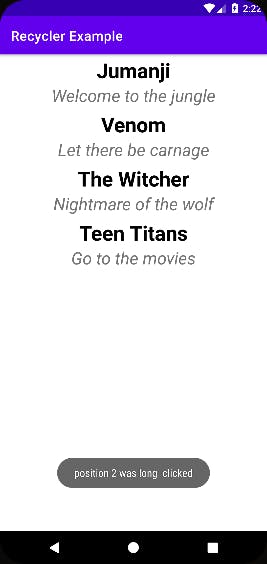
This is how you use the adapter onItemClickListener and onItemLongClickListener, the “position” is each position of the row and the “view” is each row in the RecyclerView
rv_adapter.onClickListener(
    object : RecyclerAdapter.OnItemClickListener {
        override fun onItemClick(position: Int, view: View) {
            // click execution goes here
            Toast.makeText(applicationContext, "position $position was clicked", Toast.LENGTH_SHORT).show()
        }
        override fun onLongItemClick(position: Int, view: View) {
            // long click execution goes here
            Toast.makeText(applicationContext, "position $position was long  clicked", Toast.LENGTH_SHORT).show()
        }
    }
)
 SUMMARY
If you have any question or you code is not working well you can check my git repository for clues or solutions or you can leave me a comment. https://github.com/Ohior